
Volumized Fireplace Mantel Garland
Project Inspiration
Looking to create a showstopping Christmas mantel without spending a fortune? This Christmas garland DIY is the perfect way to achieve a lush, voluminous look with just a few simple tricks. A beautifully styled mantel can instantly transform your living space into a festive holiday retreat, and the secret to achieving that high-end, designer look is all in the layering. By adding extra artificial branches and strategic lighting, you can elevate a basic garland into a luxurious statement piece that will wow your guests all season long. Whether you love a classic, minimalist vibe or prefer an over-the-top holiday aesthetic, this easy DIY is perfect for bringing cozy Christmas charm to your home.
Supplies List & Cost Breakdown
For this mantel garland, I purchased or used items I already had, which are:
1 9-ft Norfolk Pine artificial garland strand - $43.99 (I bought mine years and years ago, so this one isn’t exactly the same but it’s close!)
1-pack of 18-inch artificial Norfolk Pine branches - $34.99/18-pack
20 snow-covered faux pine cones - $18.98/20-pack
2 strands of string lights - $15.99 each, so $31.98
Total Supplies Cost = $129.94
The Secret
I love doing a simple mantel during the holidays, but in order for that to make a big impact, the garland needs to look lush and full. I’ve had the hardest time finding a single garland strand that does everything I want it to, but I’ve developed an easy “secret” that you should all know. You can purchase individual garland branches from Amazon for a great value (comes out to less than $2/branch) and stick them throughout your garland strand to give it a wispy and voluminous look that is just so luxe. I also like to spread any extra branches I have throughout other areas where I have decor (like tabletops and counters) to tie the whole look together.
Step-By-Step Instructions
On a cleared off and wiped down mantel, place your long garland strand on top and ensure it’s centered so that each side is even. If you can, try to get a strand of garland (or attach several together) so that it’s long enough to graze the floor because it gives such a dramatic and beautiful look. Fluff the garland by straightening out any bent branches to give it as much volume as possible and give it a tree-like look.
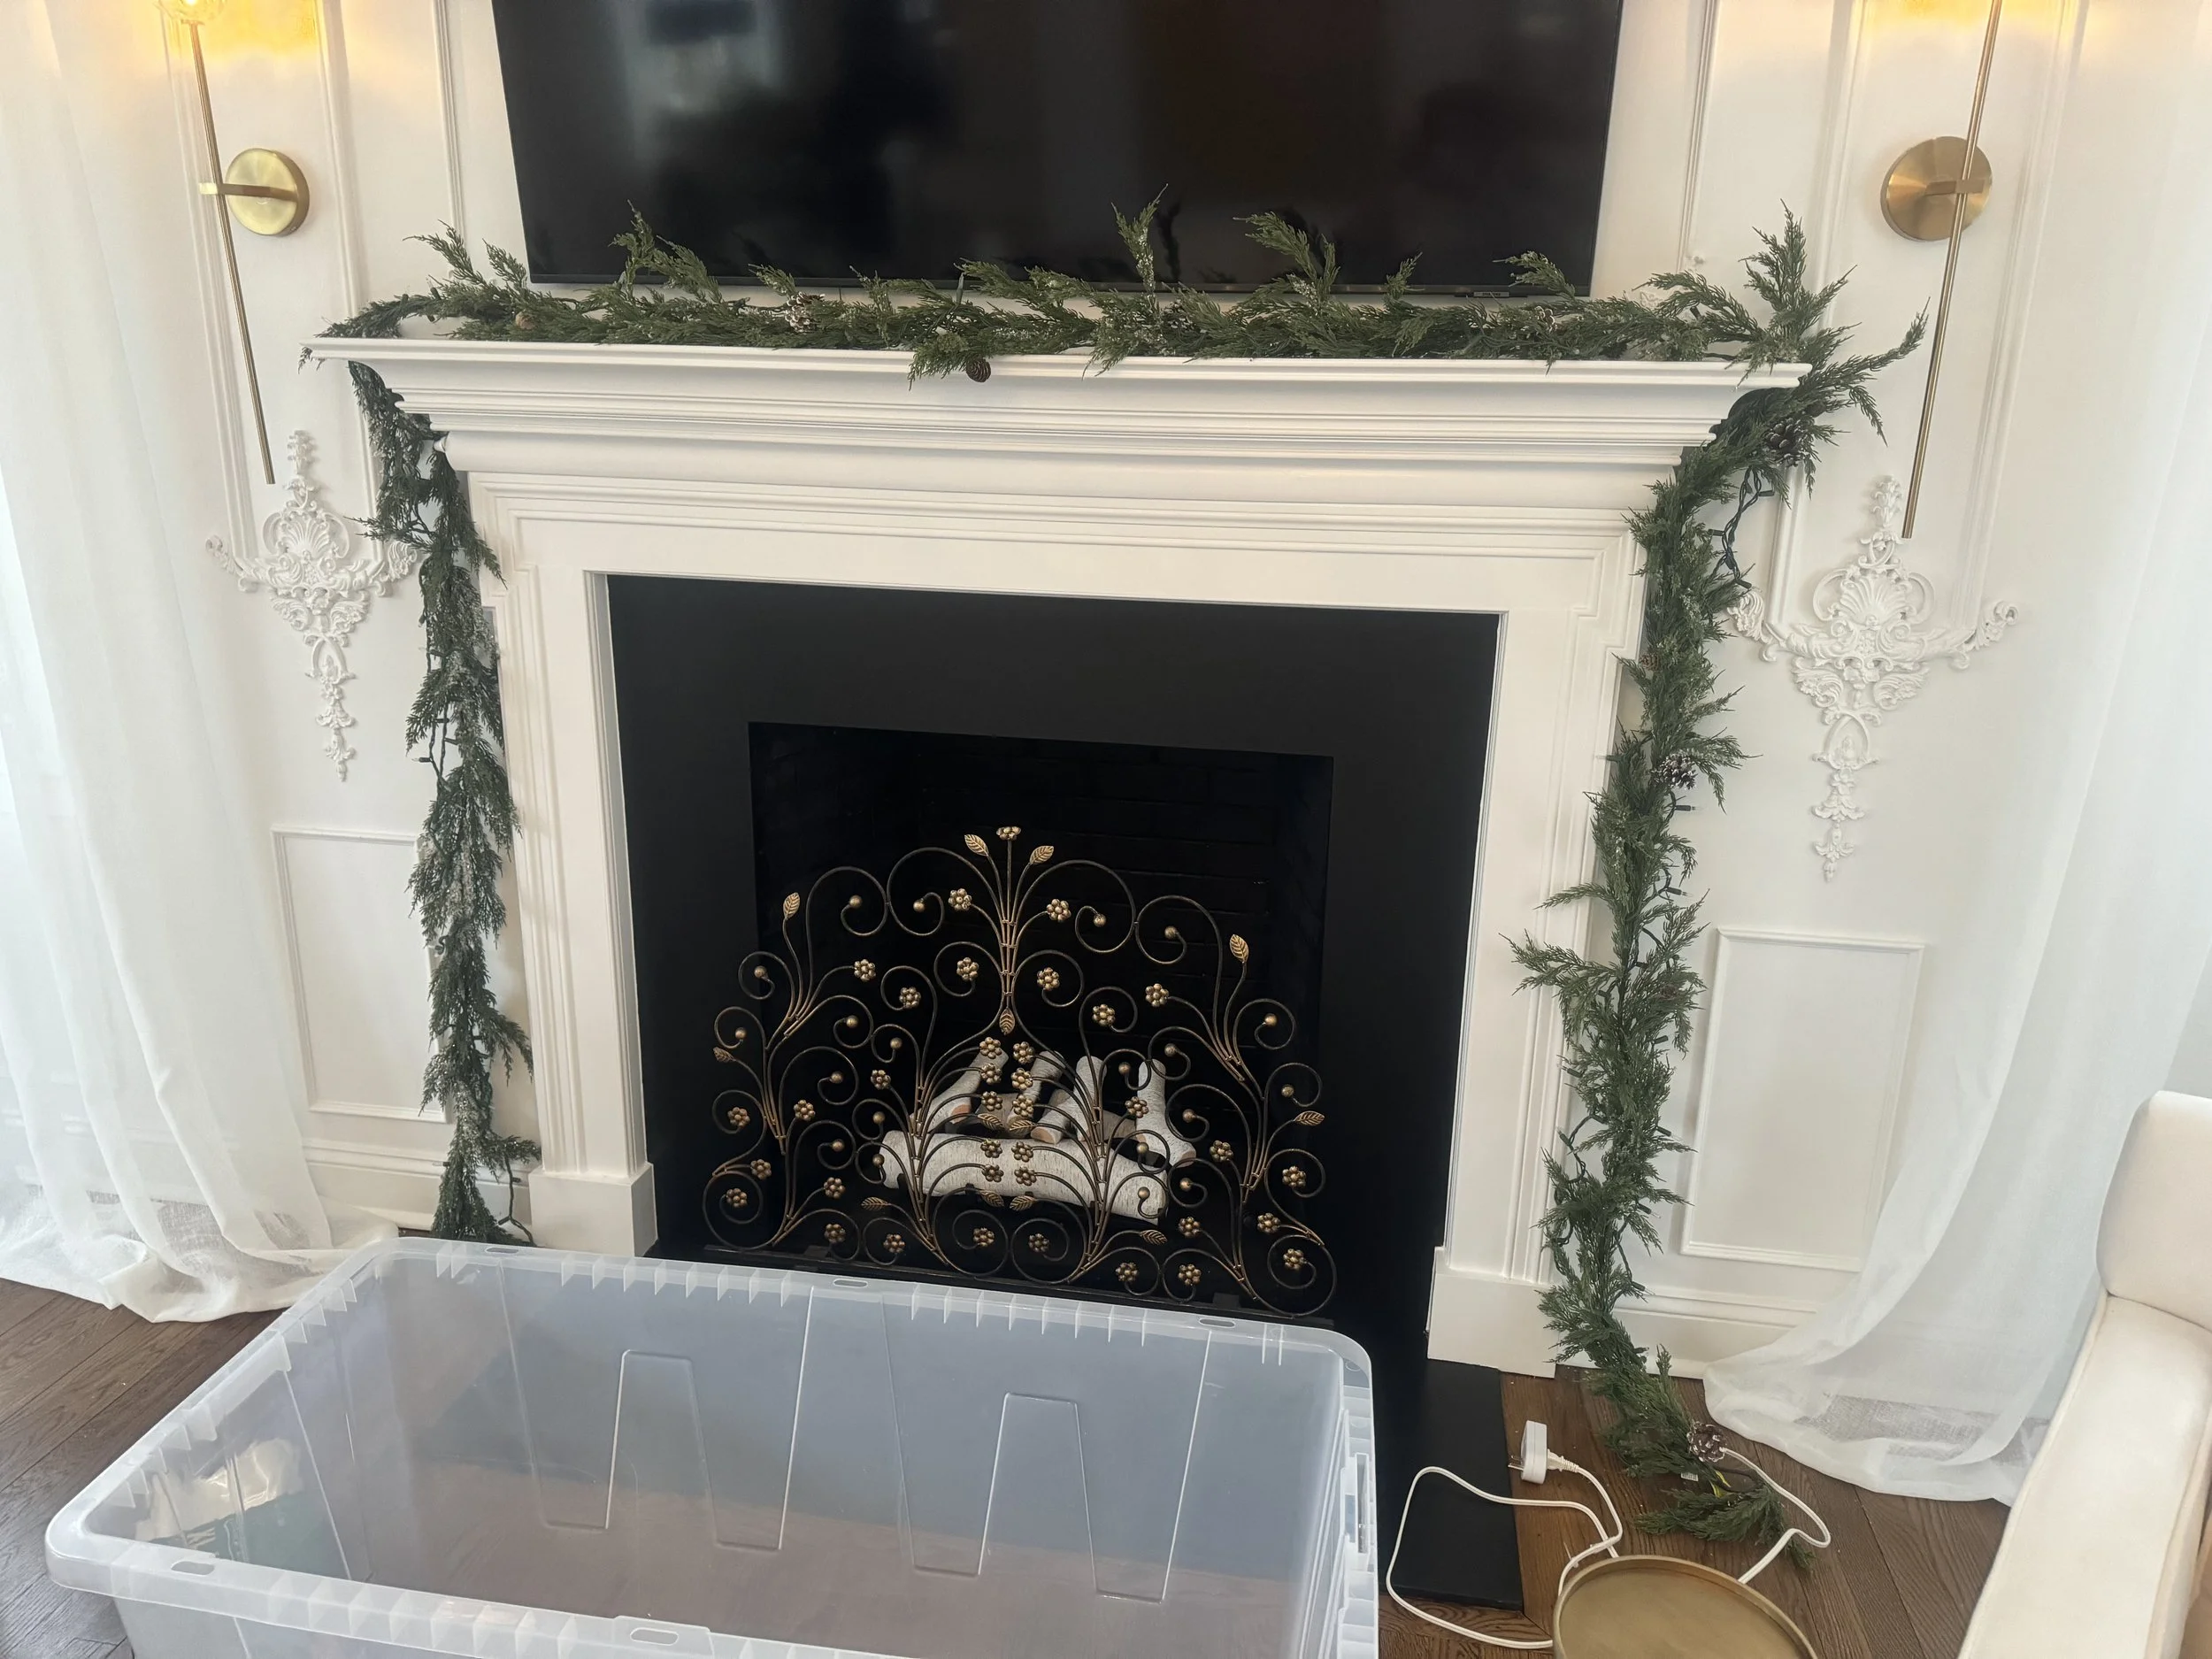
My lights and pinecones are still attached to the long garland strand from last year, but the garland branches are not inserted here yet. You can see how the single garland strand is pretty sparse, but we’re going to change that. I definitely recommend keeping the pieces together when you’re packing away your decorations so it’s even easier to set up the next year!
2. Once all of the greenery is placed to your liking, lay your string lights on top, ensuring the lights reach each end of the garland and using more than one strand (like I did) if you need. I like using white string lightbulbs that have a green wire so they blend right in with the garland.

3. Before adding the branches to the garland, you’ll want to pre-fluff these the same way you fluffed the garland: straightening out each branch and spreading them out away from each other in a tree-like fashion for the most volume.
4. Depending on how long your garland is, start tucking the stick end of the garland branch within the garland strand itself. Repeat approximately every 6 inches or so until you create the fullness you prefer. For the garland branches attached to the hanging parts of the strand, tangle and twist together the small, leafy branches so that they branch itself stays in place and doesn’t fall off. These branches should all be pointing down—not up. For the garland branches attached to the middle of the garland strand that’s resting on the mantel, point some branches up for height and point some branches down so they hang off the mantel a bit. I find that this is what really makes the garland look dramatic and luxurious.

Look at how much of a difference it makes!
5. Finally, nestle faux pinecones throughout the garland in the sparser areas and wherever you might need to hide something (like the plug of the string light cord or a garland branch stem that’s poking out).
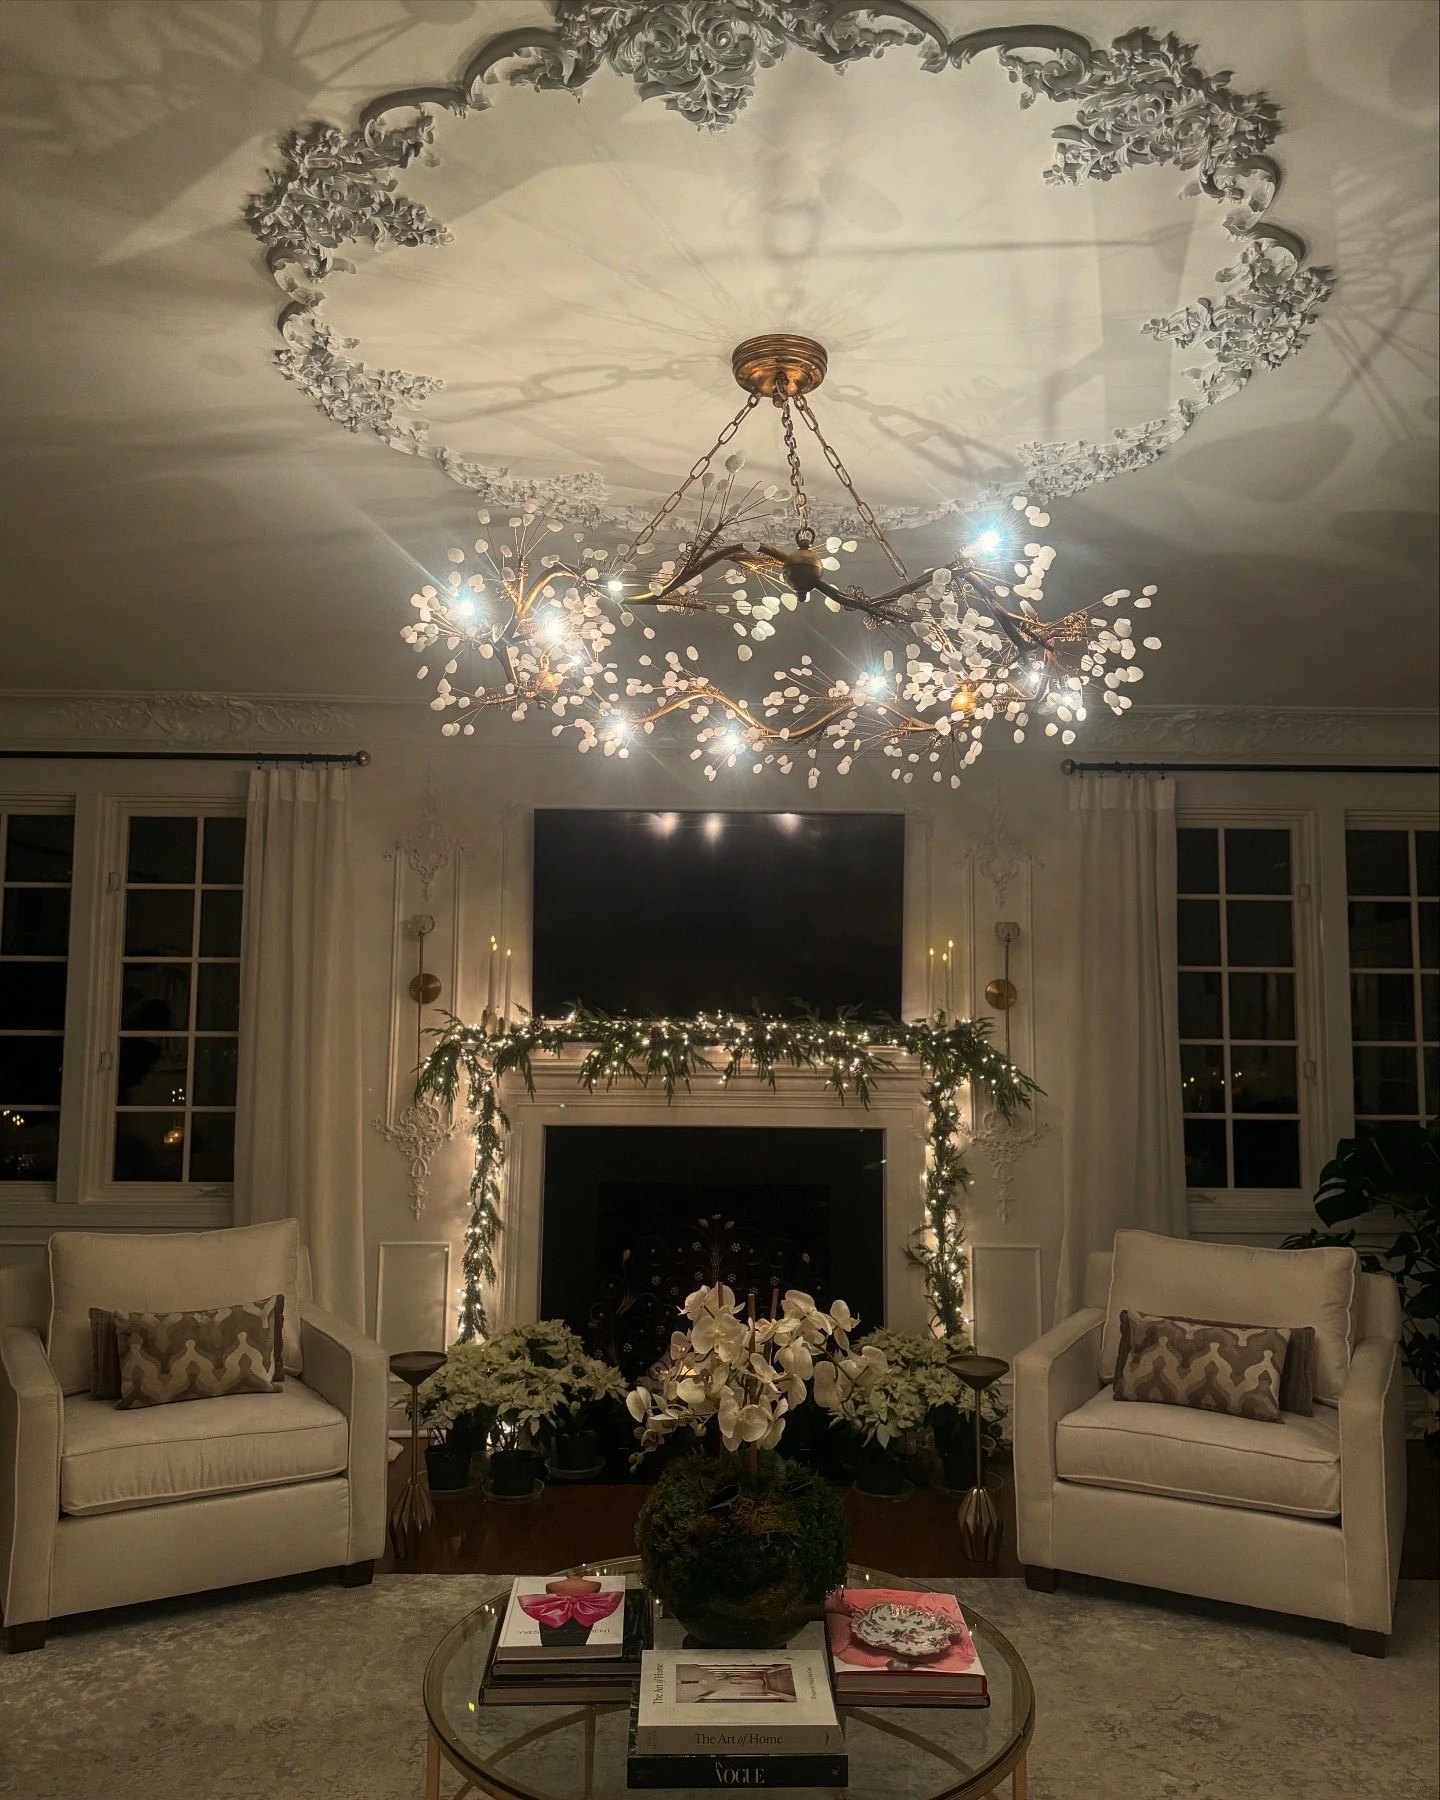
The Final Result
With just a few easy steps, you can create a stunning, full Christmas mantel garland that looks straight out of a high-end home decor magazine. By strategically layering additional branches and incorporating warm, twinkling lights, your garland will feel effortlessly lush and festive. This DIY is a great way to customize your holiday decor without the hefty price tag of designer garlands, allowing you to enjoy a beautifully styled mantel year after year. Plus, the versatility of this technique means you can reuse and refresh your decor for future holiday seasons, making it an eco-friendly and budget-friendly choice.
If you loved this Christmas garland DIY, be sure to check out our other festive projects to bring even more holiday magic into your home. Don’t forget to share your finished mantel with us—tag us on social media so we can see your gorgeous holiday setups!